Configure System API Client
Use the Guardhouse dashboard to create the System API client that external services will use when calling the Guardhouse API.
Outcome
After completing this setup, you should have:
- An
Issuer URL - A configured System API client
- A
Client ID - A
Client Secret System API Accessenabled for the client- The required access configuration for the external API
Dashboard Manual
Step 1: Open Applications > Clients
After you sign in to the Guardhouse dashboard with an account that can manage API clients, expand Applications in the left navigation menu and select Clients.
This opens the Clients page, where Guardhouse manages application clients for authentication and authorization.

Step 2: Click New Client
On the Clients page, click New client to start the client creation flow.
If this is your first client, the page may show a No clients yet empty state. You can use either New client button shown on the page.
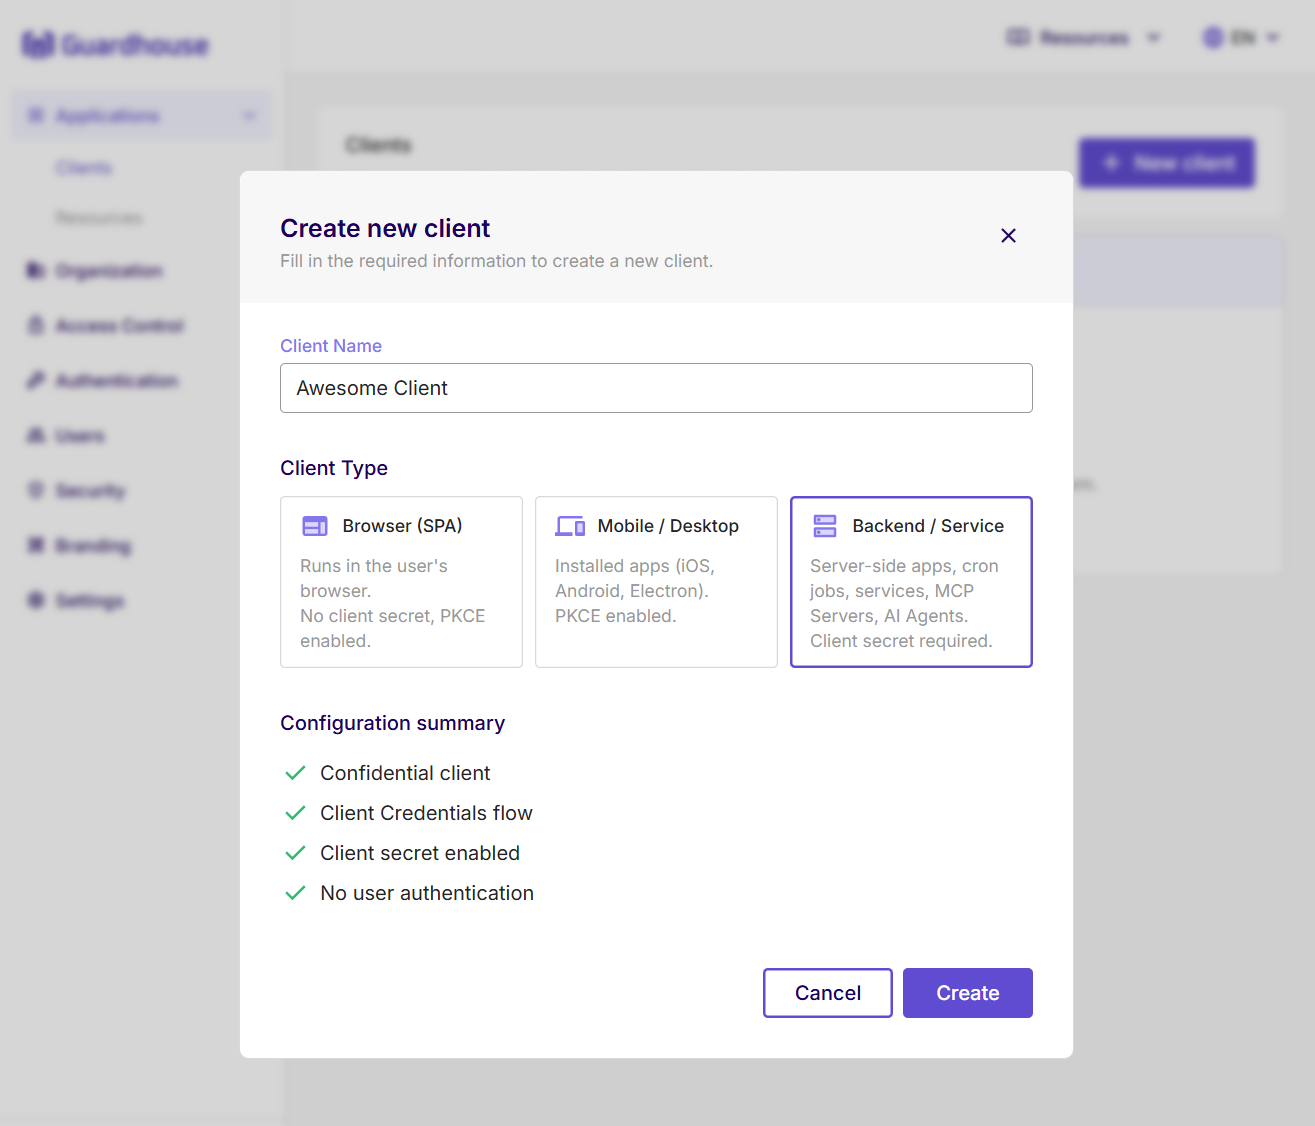
This opens the Create new client dialog.
Step 3: Select Backend / Service and Enter the Service Name
In the Client Name field, enter the name of the backend service that needs access to the Guardhouse API.
For Client Type, select Backend / Service.
This option is intended for server-side applications, cron jobs, services, MCP servers, and AI agents, and it requires a client secret.
Review the configuration summary, then click Create.
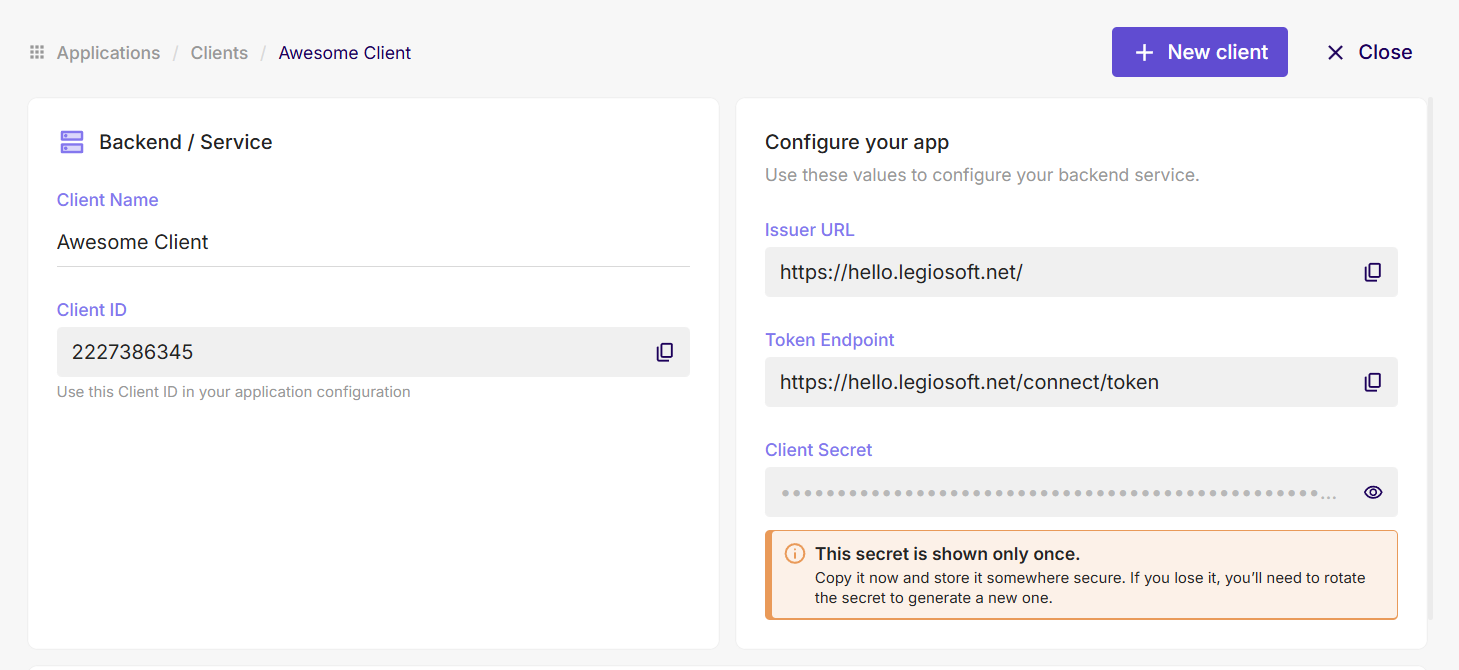
Step 4: Copy Issuer URL, Client ID, and Client Secret
After the client is created, Guardhouse shows the values your backend service needs for configuration.
Copy and store these values:
Issuer URLClient IDClient Secret
The page may also show a Token Endpoint, but for this setup step you should make sure you keep the Issuer URL, Client ID, and Client Secret.
Store the secret securely. The UI indicates that the secret is shown only once, so copy it before you leave the page.
Step 5: Enable System API Access
Open the client details page and go to the Danger Zone section.
Under System API Access, click Allow to grant this client full access to the Identity System APIs.
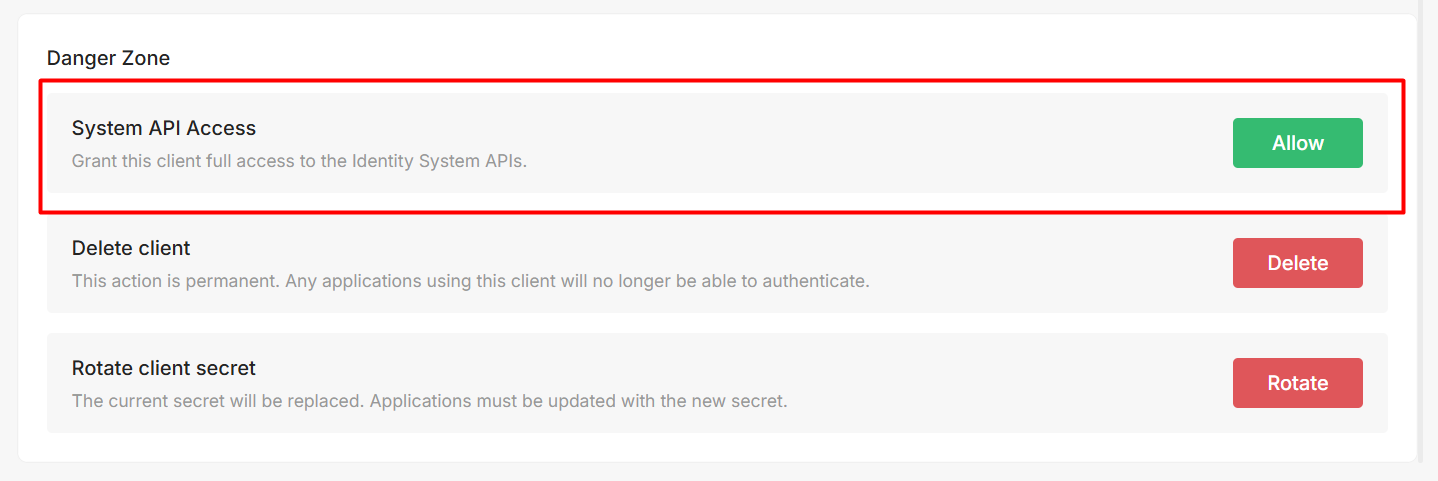
Enabling System API Access gives this backend client high-privilege administrative access to your Guardhouse identity system. Anyone who has both the Client ID and Client Secret can request tokens that act against users, roles, permissions, and other system-level API operations exposed by this integration.
Treat this client like a production admin credential:
- store the
Client Secretonly in secure server-side secret storage - never expose these credentials in browser code, mobile apps, desktop apps, logs, screenshots, or chat
- rotate the secret immediately if you suspect it was shared or leaked
- create separate clients per service or environment instead of reusing one privileged client everywhere
Step 6: Configure Your Service with the SDK or curl
Use the saved Issuer URL, Client ID, and Client Secret in your backend service.
Continue with Use Credentials Programmatically, which shows how to:
- configure a backend service with the Guardhouse
.NET SDK - follow the current
Python SDKintegration section - request a token directly with
curl
After your service can obtain an access token, you can call the documented System API endpoints using the SDK or curl.
Before You Continue
Proceed when:
System API Accessis enabled for the client- you have saved these values securely:
Issuer URL: https://your-guardhouse-instance
Client ID: YOUR_CLIENT_ID
Client Secret: YOUR_CLIENT_SECRET
Then continue with Use Credentials Programmatically.